My neighbor showed up last fall with this thing strapped to a dolly. I watched him feed a 2.5-inch oak limb into the side chute like it was nothing — the kind of branch that would make a 15-amp electric chipper give up and smell like burning motor. I started researching that same night.
The SuperHandy Mini (GUO035) has been on Amazon long enough to collect a few thousand reviews, and they’re all over the place — five stars next to one stars, side by side. After running one through a real spring cleanup, I think I understand why.
Quick Verdict
It’s a gas machine in a world that’s been moving toward electric. That means genuine 3-inch branch capacity and total cord freedom, at the cost of oil, fuel discipline, pull-start rituals, and a blade access situation that’ll make you say words you’d rather not say in front of your kids. Go in knowing that and it’s a legitimately useful tool. Expect plug-and-play and you’ll be disappointed.
Check the current price on Amazon
SuperHandy 7HP Gas Chipper Specs & Assembly Time
Ships partially assembled. You’re bolting on the discharge chute and wheels — about 25-30 minutes, one wrench, no drama. Engine oil is NOT included and does not come in the box. Add it before you even look at the pull cord. This is responsible for a meaningful percentage of the “defective unit” reviews on Amazon.
The engine is a 7HP horizontal 4-stroke single-cylinder OHV — the same basic architecture you’d find in a quality pressure washer or a riding mower. It runs on 87+ unleaded with no ethanol, 0.7 gallons max tank. That no-ethanol requirement is serious: ethanol-blend fuel sitting in a small carb for more than two or three weeks gums up the jets and turns starting into a two-hour debugging session.
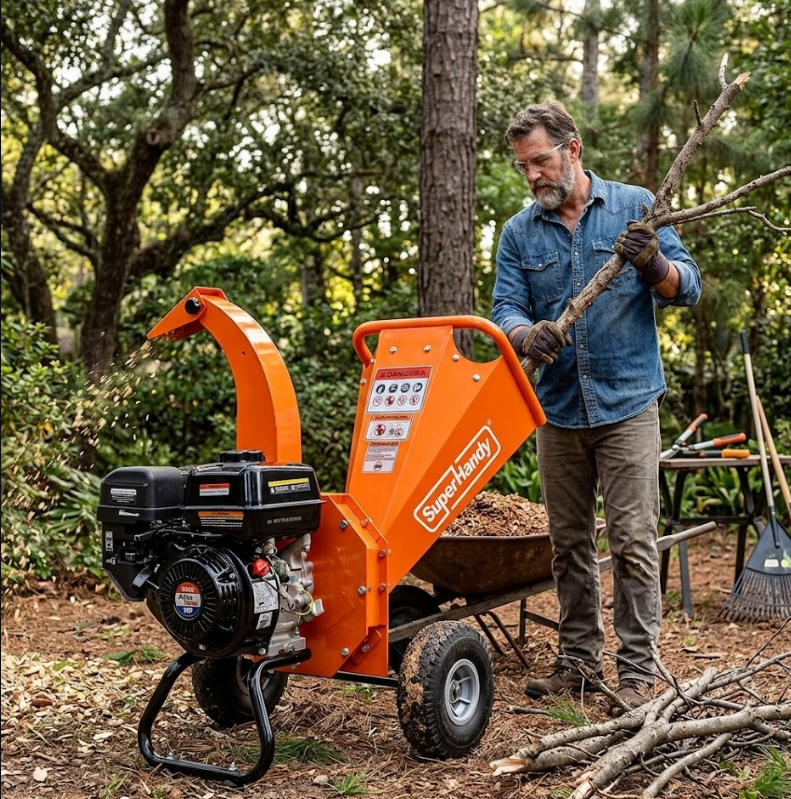
Three intake options on this machine. The side chute is the one that matters — a horizontal feed for branches up to 3 inches in diameter, chipped out through a vertical adjustable discharge chute (90° to 145°). The top hopper is a separate funnel for high-volume shredding of smaller stuff: leaves, light stalks, half-inch twigs, at a 15:1 reduction ratio. The leaf vacuum mulching function requires the optional vacuum kit, sold separately, not in the base unit.
Dimensions land at 29.5 x 25.7 x 40.6 inches. It’s compact for a gas chipper — small enough to roll around a suburban yard without needing a dedicated storage area.
What 3-Inch Branch Capacity Actually Means in Practice
Here’s the comparison that matters more than any spec table: I spent a morning running mixed oak limbs through this machine, then I borrowed my neighbor’s 15-amp electric for an afternoon session on the same pile.
The electric stalled on a 2-inch dry oak branch. Not jammed — stalled, motor laboring, chips barely moving. I had to back the branch out and reduce it further with loppers before it would feed cleanly. That session took an extra hour just in pre-processing.
The SuperHandy ate that same 2-inch dry oak without changing its note. I kept the feed slow and steady — forcing material is how you create a jam — and the chips came out the discharge chute in a clean arc. At 2.5 inches on the hardest stuff I had, it slowed visibly and I felt the rotor working, but it pushed through.
That’s the real reason to choose a 7HP gas chipper over a 15-amp electric. Not specs on paper — the moment a branch hits 1.5 inches on hardwood and you don’t have to think twice about it.
Green Wood and the Clogging Problem

Two jams in 40 minutes on fresh-cut privet. I want to be upfront about that.
The machine’s slanted housing design genuinely helps — it moves material through at a better angle than a straight-feed chipper and I’ve used worse. But wet, stringy green wood is the universal enemy of compact chippers, and this one is not immune. When it jams: kill the engine, remove the spark plug wire (don’t skip this), clear the chute manually, restart. Takes maybe 3 minutes. Still interrupts the flow.
The fix is simple and it works: let fresh-cut material dry for two days before chipping. Even sitting in sun for 48 hours takes enough moisture out of privet and ornamental shrubs that throughput is dramatically cleaner. For oak and hardwood, a week of drying makes even thick material behave.
Wet leaves in the top hopper are the other thing. They turn into paste almost immediately and block the funnel. The top hopper is a dry-material-only zone.
Starting the Engine the Right Way
Cold start sequence — this matters and doing it out of order wastes pulls:
- Fill oil first (SAE 30 or 15W-40 per manual)
- Fill tank with fresh non-ethanol 87+ fuel
- Fuel valve → ON
- Choke → CLOSED (cold engine only)
- Throttle → medium
- Kill switch → RUN
- Pull firmly — one committed stroke, not a yank
Most users get ignition in 1-3 pulls cold, first pull once warm. If it won’t catch after four or five good pulls, check the choke position and confirm the fuel line is open. If it still won’t start: smell the exhaust area. Fuel but no ignition usually means the spark plug. No fuel smell at all usually means the fuel line or carb is the issue.
Store with stabilized fuel or run the engine dry at end of season. A dry carb over winter is a happy carb in spring.
Step-by-Step: Sharpening the 3-Hole Blades
Plan on sharpening around every 8-10 hours of use. Dull blades cause jams, stress the engine, and produce worse chips. Here’s how to do it without losing a bolt in the process:
Step 1 — Disconnect completely. Kill the engine, let it cool, remove the spark plug wire. Not negotiable.
Step 2 — Open the access panel. It’s on the side of the housing. The panel is small — only slightly larger than the blades — so working room is tight.
Step 3 — Photograph the blade orientation before removing anything. You’ll thank yourself during reassembly.
Step 4 — Hold the rotor steady with a block of wood inserted through the feed chute (gently). This keeps the rotor from spinning while you break the hex bolts loose.
Step 5 — Remove blade bolts. They’re in tight. An impact driver makes this significantly easier than a hand wrench. Keep the bolts and any washers in a magnetic tray — they’re small and the grass will eat them.
Step 6 — Sharpen with a bench grinder or flap disc on an angle grinder. Match the existing bevel angle. A few passes on each face, keep the metal cool (don’t overheat the edge), check for burrs.
Step 7 — Reinstall at exact torque spec from your manual. Under-torqued blades shift during operation. Over-torqued bolts strip the threads in the rotor.
On replacement blades: the manual specifies a 3-hole configuration. Check that whatever is currently in the SuperHandy Amazon store matches your unit before you need them. Blade availability for this model has been inconsistent, and finding out your blades are discontinued mid-season is not a fun afternoon.
Fuel, Ethanol, and Why Half the Bad Reviews Are Fuel Problems
This is worth its own section because it explains so much of the variance in reviews.
Ethanol-blend gasoline — which is most gas sold in the US at standard pumps — absorbs atmospheric moisture. In a small engine that sits unused for more than two or three weeks, that moisture plus the ethanol itself starts breaking down into gummy deposits in the carburetor. The symptom is a machine that won’t start, runs rough, or starts and immediately dies.
Solutions: use non-ethanol fuel (often labeled as “recreational fuel” or 90+ octane at marina and outdoor power equipment stations), add a quality fuel stabilizer like Sta-Bil to every tank if you’re using regular pump gas, and run the machine completely dry of fuel at end of season.
A machine that sits over winter with ethanol-blend fuel in the carb will have starting problems in spring. That’s not a defect — that’s physics. The reviews that describe a brand-new unit refusing to start are usually this problem.
Is This Chipper Right for Your Yard?
The honest answer comes down to your branches.
If your yard produces mostly rose canes, privet trimmings, and shrub clippings — material consistently under 1.5 inches — a 15-amp electric chipper is genuinely less hassle and works fine. No oil, no pull-start, no ethanol concerns, no blade access drama. Plug it in, flip a switch.
If your yard has actual trees — oak, maple, ash, anything with limbs that regularly hit 2 inches and up — and you’re tired of pre-cutting everything down to electric-chipper size, that’s exactly the gap this machine fills. It handles material that no $150 corded chipper will touch, it runs without a cord, and it can be towed around a property if you add the optional tow bar kit.
The optional vacuum kit is also worth knowing about if autumn leaves are your main problem. That turns this into a different machine — a mulching system rather than a branch chipper. Sold separately, but the hooks are already on the housing.
Before You Buy — A Short Checklist
- Check that replacement blades (3-hole) are currently available in the SuperHandy Amazon store
- Locate a source for ethanol-free fuel near you before the machine arrives
- Order a quart of SAE 30 or 15W-40 engine oil — it does not come with the unit
- Read the starting sequence in the manual once before you pull the cord the first time
- Plan blade sharpening as routine maintenance, not a crisis
Final Call
The SuperHandy Mini is the right tool for people with real branches who are willing to treat it like a gas machine — which means fuel discipline, seasonal maintenance, and occasionally spending twenty minutes under the access panel with a wrench.
It’s not the right tool for people who want to flip a switch and walk away. That’s not a criticism; it’s a category distinction. Electric chippers exist for that use case and work well for it.
But if you’ve got a stack of 2.5-inch oak limbs and you’re tired of the sound your 15-amp electric makes when it sees them — this is what you’re looking for.
Get the SuperHandy Mini Wood Chipper on Amazon
Disclosure: This post contains Amazon affiliate links. If you purchase through these links, I may earn a small commission at no extra cost to you.